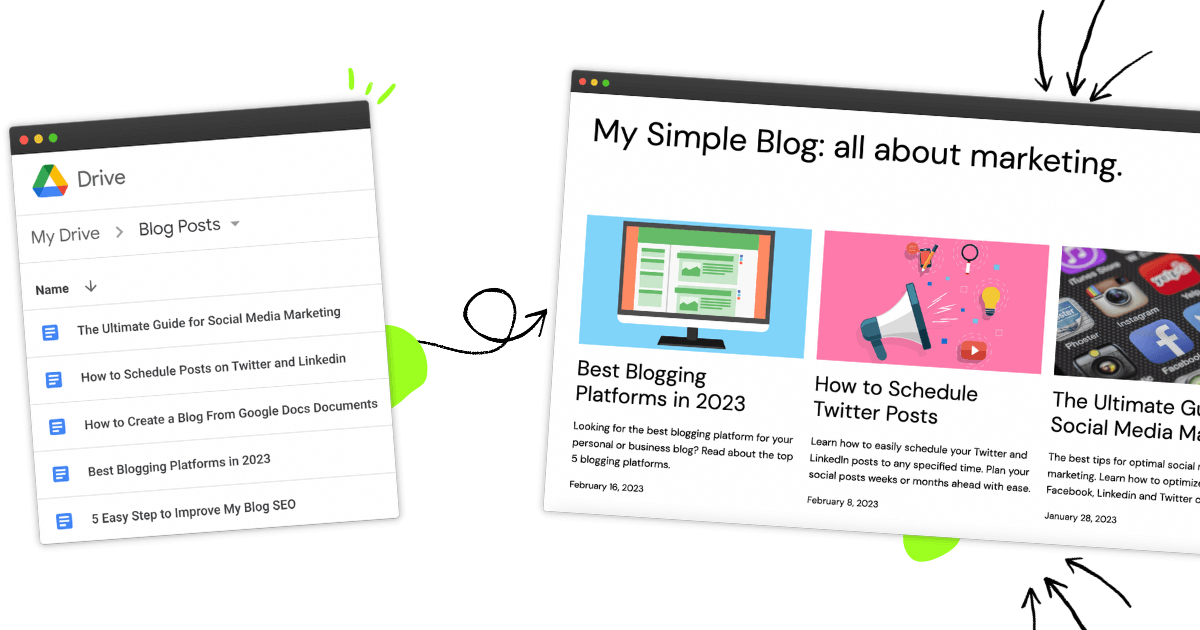
Writing blog posts using Google Docs as the content management platform has gained immense popularity among bloggers. Its convenience, collaborative features, and user-friendly interface make it a top choice for content creation. With powerful editing tools and seamless integration with other Google services, bloggers can easily collaborate, track changes, and receive feedback within the document. Google Docs streamlines the editing and refinement process, enabling bloggers to produce high-quality content.
In this blog post, we will explore the process of writing content with Google Docs and harnessing its advantages, while also addressing the challenge of seamlessly publishing that content to a blogging platform. By the time you finish reading this post, you’ll have all the knowledge you need to create an easy and seamless Google Docs to blog writing experience.
Step 1: Copy the blog post template
We created an easy to use Google Docs template for writing blog posts, designed to simplify your blog post writing process. This template provides a structured framework that helps you organize your thoughts, streamline your writing, and maintain a consistent format throughout your blog posts. With designated sections for the introduction, body paragraphs, headings, subheadings, and conclusion, you can focus on crafting engaging content while ensuring a visually appealing and reader-friendly layout.
To start using this template and make it your own, follow these simple steps.
- Open the Google Docs template, and from the menu at the top, click on “File”.
- Then select “Make a copy.”
- A dialog box will appear where you can specify the destination for your copied document. Choose the location in your Google Drive where you want to save the new document and provide a name for it.
Once you’ve made a copy of the document, you can start writing your own blog post. Customize the content, tweak the formatting, and tailor it to your specific needs. This way, you can leverage the existing structure and layout of the original document while adding your unique voice and ideas.

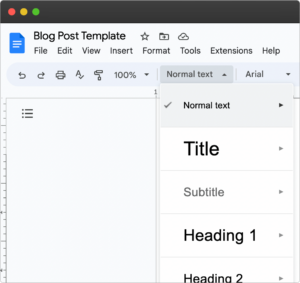
Step 2: Organize content with headings
One of the key elements of creating a well-structured and reader-friendly blog post is organizing your content effectively. In Google Docs, you have access to a range of formatting options that can help you achieve this. One of the most powerful tools at your disposal is headings.
Headings allow you to divide your blog post into sections and subsections, making it easier for your readers to navigate and comprehend your content. Not only do headings create a visual hierarchy, but they also assist in search engine optimization (SEO) by signaling the importance and structure of your text to search engines.
To set text as heading in Google Docs, follow these steps:
- Identify the main sections and subsections of your content.
- Place your cursor at the beginning of a section or subsection.
- Go to the toolbar and click on the “Paragraph styles” dropdown menu.
- Choose the appropriate heading style for the section or subsection.
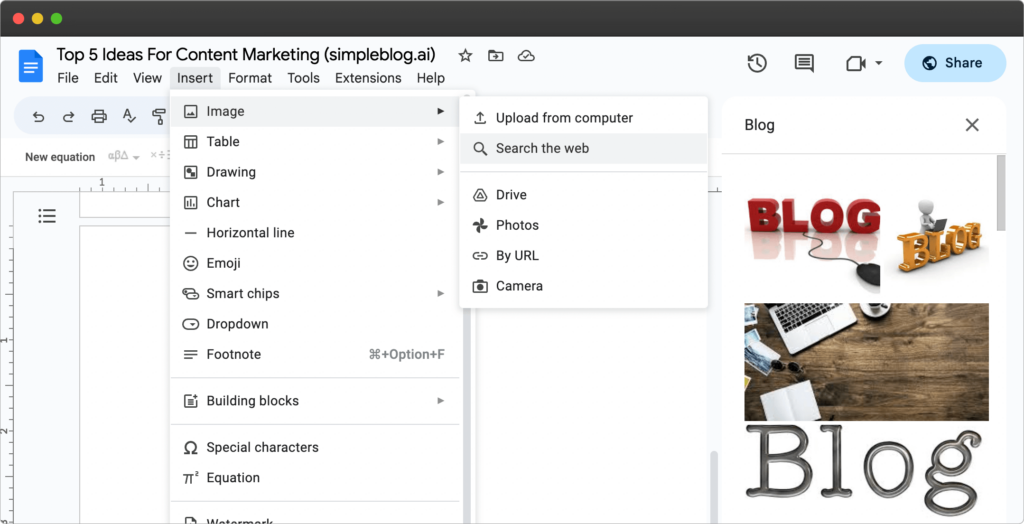
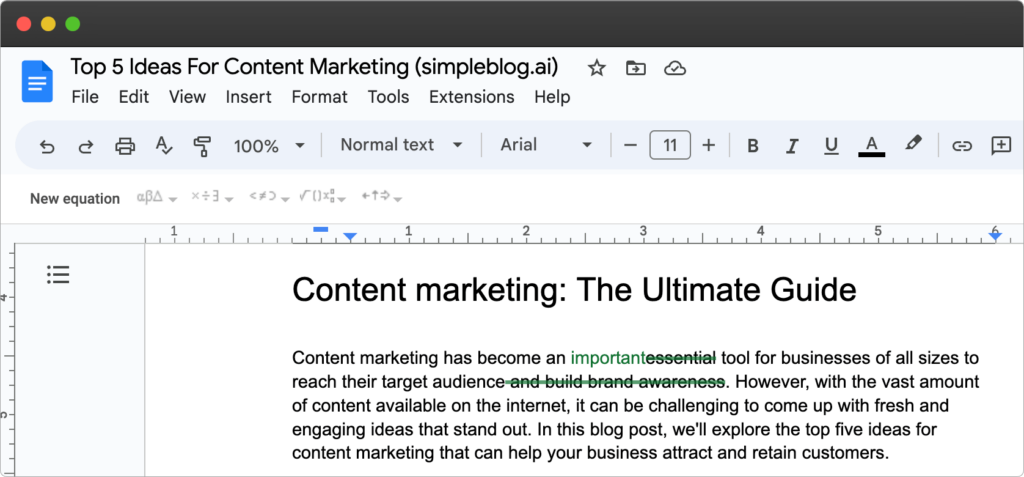
Step 3: Add visuals and images
Images and unique visuals play a crucial role in creating compelling and engaging blog posts. They serve as powerful tools to captivate and retain the attention of your readers.
Incorporating relevant and high-quality images not only breaks up the text but also helps to convey information, evoke emotions, and enhance the overall aesthetics of your content. Images can illustrate concepts, provide examples, or showcase products, making your blog post more visually appealing and informative.
These articles and research papers show the importance of visuals in your blog:
- 90% of the information processed by the brain is not textual, but rather visual.
- It takes 13 milliseconds for the human brain to process an image, while it takes much longer to read the equivalent text.
- The human brain processes images 60,000 times faster than text according to a 3M study.
- People remember 65% of what they see, compared to 10% what they hear.
To find free stock images for your content using Google Docs, you can utilize the built-in “Explore” feature. Here’s how:
- Open your document.
- Click on the “Insert” menu.
- Choose “Image” and click “Search the web”.
- Enter relevant keywords in the search bar.
- Scroll through the images and select the one you want to use.
- Drag and drop the selected image into your document or click the “Insert” button.
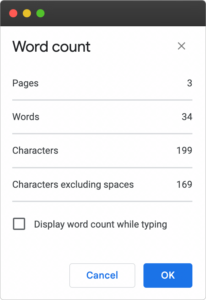
Step 4: Track word count
Word count holds significant importance when writing a blog post. It helps ensure that your content is concise, well-structured, and suitable for online reading. By adhering to an appropriate word count, you can maintain the attention of your readers, deliver your message effectively, and increase the chances of engagement.
Additionally, word count is a crucial consideration for SEO purposes, as search engines often prioritize longer, informative posts. A study by SEO Journal showed that the ideal blog post length is 2,100-2,400 words. Striking the right balance between providing valuable information and avoiding excessive verbosity can lead to improved search rankings and increased visibility for your blog.
To check the word count in Google Docs:
- Open your document.
- Look at the bottom left corner for the word count display.
- If not visible, go to the “Tools” menu at the top.
- Select “Word count” from the dropdown menu.
- A window will show the word count and other information.
- Review the word count for your desired target or guidelines.
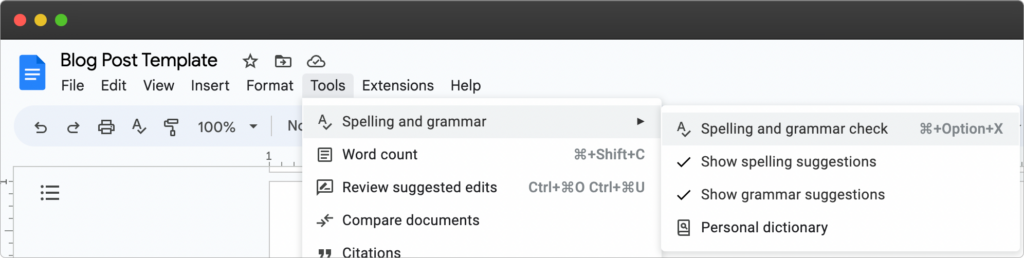
Step 5: Check spelling and grammar
Correct spelling and grammar play a crucial role in both reader satisfaction and SEO (Search Engine Optimization). In terms of SEO, search engines prioritize high-quality content that is free from spelling and grammar errors. Properly spelled words and grammatically correct sentences contribute to the overall credibility and professionalism of your content. Search engines interpret well-written text as a sign of authority, leading to better search rankings. Additionally, for readers, accurate spelling and grammar enhance the clarity and comprehension of your writing. Readers are more likely to engage with content that is error-free and easy to understand.
In 2021, John Mueller, Search Advocate for Google was asked if grammar affects SEO ranking. He said he considers spelling and grammar a “gray area”, as if Google’s crawlers can’t determine what the page is about, it can’t be indexed appropriately.
To check spelling and grammar in Google Docs, follow these steps:
- Open your document.
- Go to the “Tools” menu.
- Select “Spelling and grammar”.
- Errors will be highlighted in the text.
- Right-click on a highlighted word or phrase to see suggested corrections.
- Choose the correct option or click “Ignore” if desired.
- Address all identified issues in the document.
- Proofread the document for a final review.
Step 6: Share for review
Having your blog post reviewed by peers offers numerous benefits, including improving the overall quality and effectiveness of your content. Peer review provides valuable insights, constructive feedback, and fresh perspectives that can help identify areas for improvement, catch errors, and enhance clarity. In Google Docs, you can easily facilitate the peer review process using the Share, Track Changes, and Comments features. Here’s a short step-by-step guide:
- Open your document.
- Click on the “Share” button in the top-right corner.
- Enter the email addresses of your peers and choose their access level.
- Click “Send” to share the document.
- Peers can add feedback using comments or suggested edits.
- Review their feedback and make necessary revisions.
- Resolve comments and address suggested edits.
- Finalize your blog post and express gratitude to your peers.
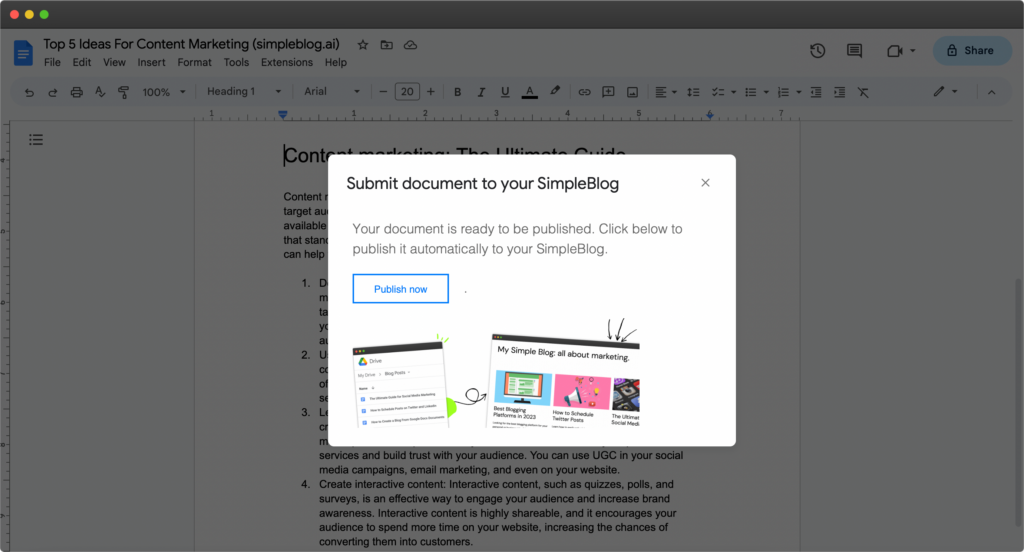
Step 7: Publish from Google Docs to blog
Having a platform that enables seamless publishing of blog posts directly from Google Docs brings immense efficiency and time-saving benefits to content creators.
By eliminating the need to copy and paste content or go through complex formatting processes, this streamlined approach simplifies the publishing workflow.
With a single click, writers can transform their finished blog post into a ready-to-publish format, complete with the desired styling and formatting.
Using SimpleBlog.ai, you can easily publish your blog posts directly from Google Docs, with a single click:
- Register a free account at simpleblog.ai.
- Choose a subdomain, or configure a custom domain.
- Submit a link of your Google Docs to be published.
- You’re all done, your blog is up and ready for your readers.
Leave a Reply